

Peas are one of the easiest and most satisfying crops to grow. Even beginners can succeed with them.
They don’t need much: just cool weather, decent soil, and regular watering. In return, you get crisp, sweet pods that taste great fresh and are easy to freeze or add to meals.
Peas are practical. They are also beautiful. Their soft green vines, curling tendrils, and delicate blooms add gentle charm to any raised bed or garden corner. Plant them in a teepee shape, and peas can become a living centerpiece that is both lovely and productive.
Whether you’re planting along a fence or adding height to a flower bed, peas are a beginner-friendly crop that makes your garden feel full of life from the very start.
In This Guide
- Tools You’ll Need for Raised Bed Pea Gardening
- Materials You’ll Need for Raised Bed Pea Gardening
- Where to Place Your Raised Bed & Best Climate for Growing Peas
- How to Plant Peas in a Raised Bed
- Why and How to Support Peas
- How to Mulch Peas
- Watering Peas
- Do Peas Need Fertilizer?
- How to Tell When Peas Are Ready to Harvest
- How to Pick Peas
- Pea Plant Problems: What Can Go Wrong and How to Fix It
Tools You’ll Need for Raised Bed Pea Gardening
To grow peas successfully in a raised bed, you’ll need just a few essential tools.
- Garden shovel – for filling the raised bed with soil and mixing amendments if needed.
- Gardening gloves – to protect your hands while handling soil and plants.
- Hose with a shower head – provides gentle watering to avoid disturbing young seedlings.
Materials You’ll Need for Raised Bed Pea Gardening
Gather these essential materials before planting.
- Soil. Choose a light, well-draining mix with a balanced pH (6.0–7.0) for healthy root growth. Avoid soils high in readily available nitrogen, which can occur with excessive use of organic fertilizers like fresh manure, as peas do not grow well in these conditions.
- Raised bed frame. A wooden, metal, or composite box to hold the soil and provide structure.
- Pea seeds. Opt for bush or climbing varieties suitable for raised beds.
- Mulch (straw or pine needles). Helps retain moisture, suppress weeds, and regulate soil temperature.
- Pea supports. Use sticks tied at the top into a triangle or a small trellis to support growing vines.
Where to Place Your Raised Bed & Best Climate for Growing Peas
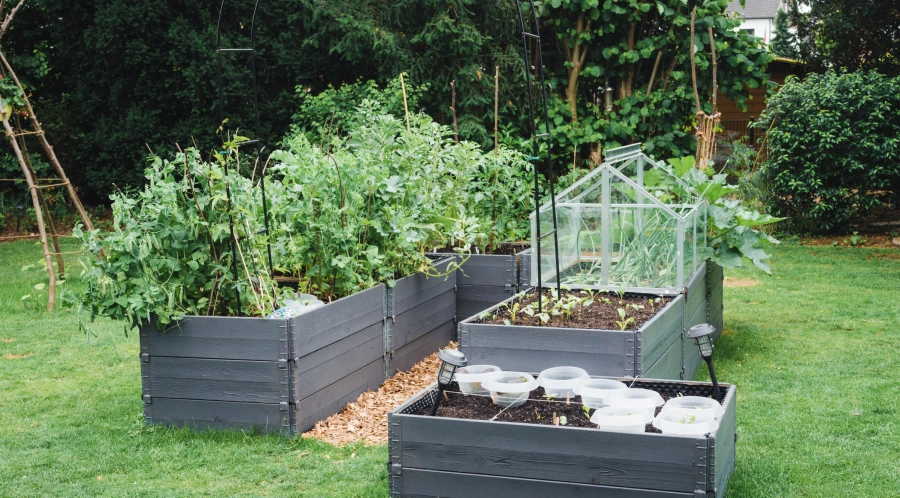
Peas thrive in cool weather and need the right placement for optimal growth. The best spot for your raised bed depends on your area.
- In cooler climates (cold winters, warm summers). Place the raised bed in a full-sun location to maximize warmth in early spring. Peas grow best when the soil reaches 50–68°F (10–20°C) and should mature before hot summer weather arrives. A south-facing garden bed will warm up faster in spring, giving peas a strong start.
- In warmer climates (mild winters, hot summers). Choose a partially shaded spot, especially one that gets afternoon shade. Too much heat can cause peas to stop producing and wilt. A location near a fence, trellis, or taller plants can help provide relief from intense sun while still allowing good air circulation.
- Peas prefer well-drained soil, so avoid low-lying areas where water pools after rain.
Tip. If you want to learn more about the best planting time for peas in your area and understand their growing needs in different climates, check out our detailed guide on when to plant peas.
Best Practices for Planting Peas
- Check your seeds before planting.
Open the seed packet and inspect for any damage, such as holes caused by pests. Discard any defective seeds.
- Soaking is optional.
While not required, soaking can speed up germination, especially in dry conditions. Soak peas in room-temperature water for 8–12 hours before planting. If you’re short on time, 2–4 hours in warm water (100°F / 38°C) can also work. Avoid soaking for longer than 12 hours, as this may cause the seeds to rot.
How to Plant Peas in a Raised Bed
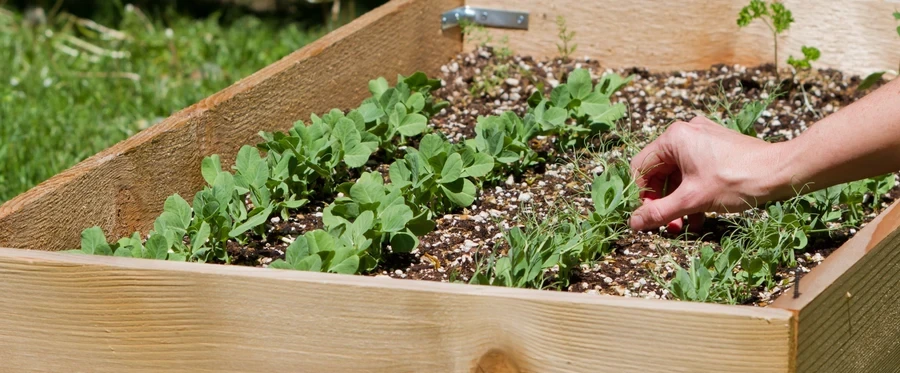
- Dig shallow trenches
Start by making a trench about 1 inch (2.5 cm) deep. Space each row 6–7 inches (15–18 cm) apart. In smaller raised beds, you can reduce the spacing slightly to fit more plants.
- Moisten the soil
Before planting, water the trench until the soil feels like a wrung-out sponge—moist but not soggy. If water sits on the surface, pause and let it soak in. Moisture at this stage helps kickstart germination without causing rot.
- Add the seeds
Place seeds about 2 inches (5 cm) apart. For better germination, plant two seeds per spot—you can thin the weaker one later if both sprout.
- Cover and press lightly
Backfill the trench with soil and gently press it down with your hand. Avoid packing the soil too tightly—peas sprout best in loose, well-aerated conditions.
- Protect from birds
Newly planted pea seeds are irresistible to birds. To protect them, cover the bed with something light and breathable until seedlings appear.
Don’t have garden fabric? Try
- an old bedsheet draped over low stakes
- a layer of burlap
- loose twigs arranged across the bed
- an upside-down crate or laundry basket
Remove the cover once the first shoots break through the soil.
Why and How to Support Peas
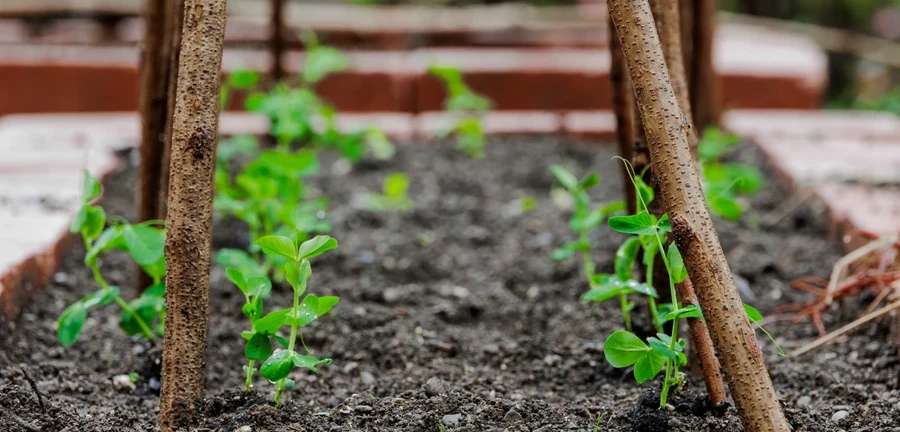
Even low-growing pea varieties benefit from support. It helps the plants stay upright, improves airflow, reduces the risk of disease, and makes harvesting easier. Plus, vertical growth saves space and lets sunlight reach more of the plant.
Start adding support when the seedlings reach about 6 inches (15 cm) tall. The simplest method is to stick thin branches or pruned twigs into the soil in a crisscross pattern along the bed. You can also use a tomato cage, small trellis, mesh netting, or string teepee—anything that gives the vines something to cling to.
Tip. Choose a support that’s taller than the mature plant, and put it in early so you don’t disturb the roots later.
How to Mulch Peas
When your pea plants reach about 6 inches (15 cm) tall, it’s time to mulch. Spread a 2-inch (5 cm) layer of organic mulch around the base of the plants. Good options include straw, compost, shredded leaves, or grass clippings (as long as they’re chemical-free and not too thick).
Mulch helps in three important ways.
- Retains moisture so the soil doesn’t dry out too quickly
- Regulates soil temperature during hot days or sudden cold snaps
- Suppresses weeds that compete for water and nutrients
- Make sure the mulch is light and fluffy, not packed down. A dense or soggy layer can trap too much moisture and lead to root rot, especially in raised beds with fast drainage.
Tip. In hot or dry areas, mulching isn’t optional—it’s essential. Without it, the soil heats up and dries out quickly, stressing the plants right when they need moisture most.
Watering Peas
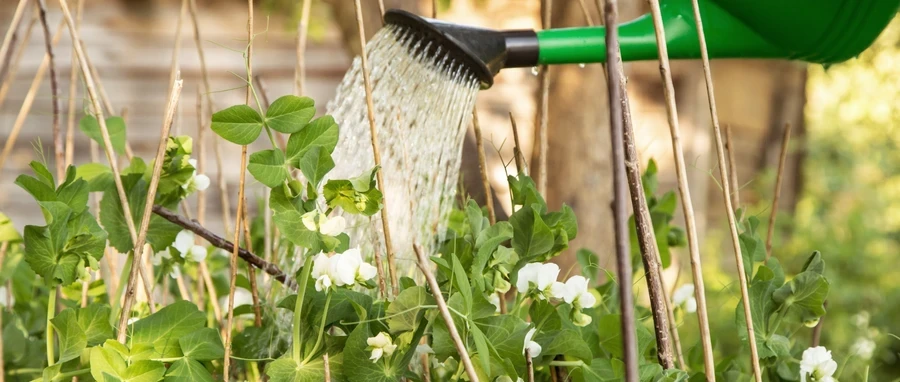
Water the peas when the top 2 inches (5 cm) of soil feel dry. This need increases in regions with a dry climate. Peas need water the most during seed germination and the flowering stage.
Important. It’s best to water early in the morning or late in the evening. Aim the water at the base of the plants to keep the leaves as dry as possible, which helps prevent disease.
Do Peas Need Fertilizer?
In most cases, peas don’t need fertilizer at all. Unlike many vegetables, peas can make their own nitrogen with the help of special bacteria that live on their roots. These bacteria pull nitrogen from the air and turn it into food the plant can use.
Learn more about soil prep and crop rotation before planting peas.
Adding extra fertilizer can actually do more harm than good. This is especially true for anything high in nitrogen. It can disrupt the root bacteria, reduce flowering, and lead to fewer pods.
You should also avoid heavy doses of mineral fertilizers like phosphorus or potassium. Too much can make the pods tough or slow the plant’s growth.
The best thing you can do for peas is keep the soil moist and well-drained. If the weather turns cold or dry, the natural nitrogen process may slow down, but even then it’s usually better to wait it out than to feed peas with store-bought fertilizer.
How to Tell When Peas Are Ready to Harvest
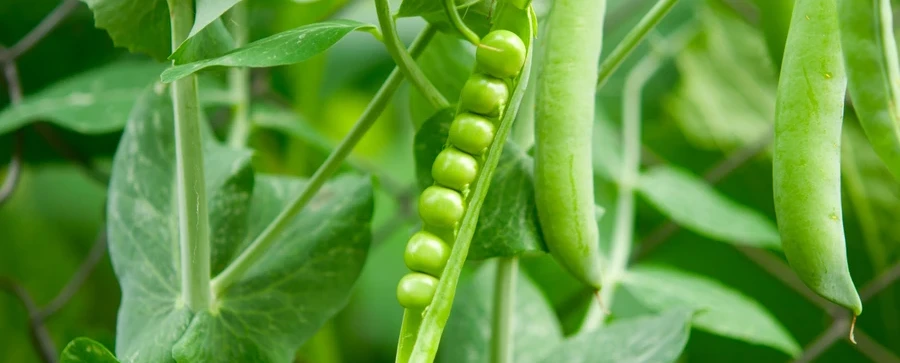
Peas mature quickly and don’t ripen all at once. Check your plants regularly to catch them at their sweetest stage. The signs of ripeness vary slightly by type.
Shelling Peas (English Peas)
These are grown for the peas inside the pod. You can recognize good ones by the following qualities.
- Firm feel when gently squeezed, but not rock-hard.
- Full interior. Peas should be round, well-formed, and fill out the pod.
- Sweet flavor. A bitter or starchy taste means the pod is either too young or too old.
Pea Maturity & Flavor Chart
| Maturity Level | Taste Qualities |
| Young | Delicate, sweet, crunchy |
| Mature | Dense, rich, slightly nutty |
| Overripe | Bitter, firm, lost freshness |
Fun Fact. Peas are at their sweetest immediately after harvest. As soon as the pods are removed from the plant, the sugar in the peas begins to turn into starch. Therefore, they are most flavorful when consumed right after being picked.
Sugar Snap Peas
Snap peas are harvested and eaten pod and all. You’ll know they’re ready if they show these signs.
- The pod is plump, crisp, and still tender.
- The peas inside have just begun to swell but are not bulging.
- The pod breaks with a clean snap when bent.
Different varieties reach maturity at different sizes. Check your seed packet for guidance. If left too long, snap peas become tough, starchy, and lose their flavor.
How to Pick Peas
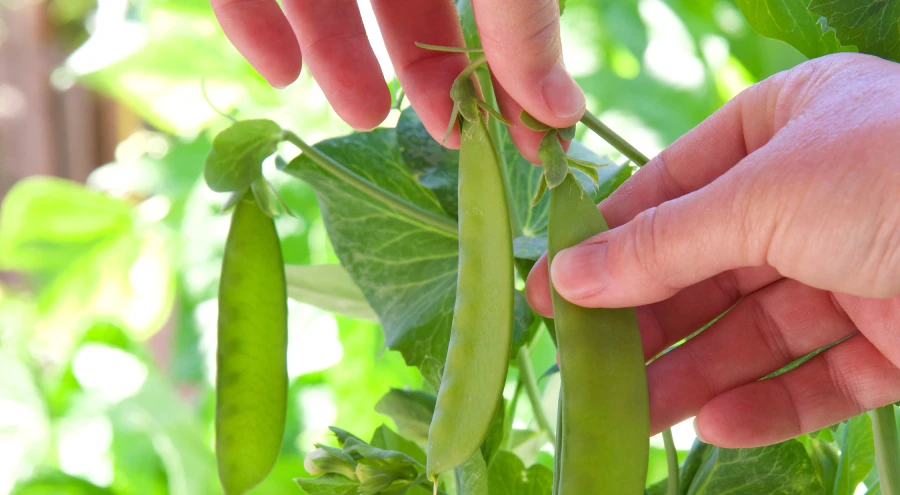
Once your peas are ripe, pick them gently and often. The more you harvest, the more pods the plant will produce.
To avoid damaging the plant, use two hands: hold the stem with one hand and snap off the pod with the other. You can also use scissors or garden snips to cut the pods cleanly. Tugging can break the stem or pull off nearby pods.
Tip. Check your plants every day or two during peak harvest. Pods mature fast, and waiting too long can lead to tough, starchy peas.
Pea Plant Problems: What Can Go Wrong and How to Fix It
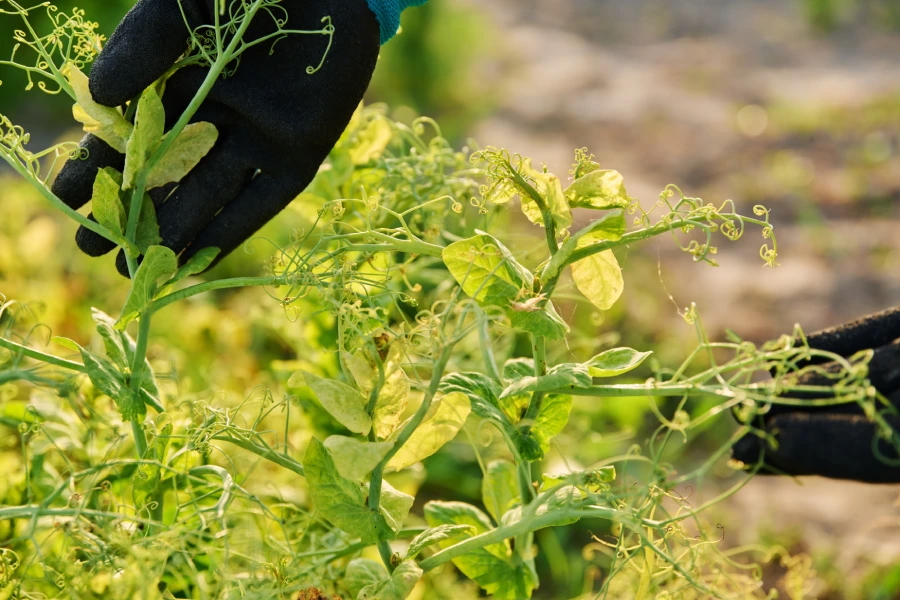
Peas are generally easy to grow, but even the most low-maintenance crops can run into trouble. Weather swings, poor soil, or overcrowding can all affect how your plants grow and produce.
Here are some of the most common issues gardeners face when growing peas—plus simple ways to fix or prevent them.
| Problem | Cause | Solution |
| Pea sprouts fall, wilt, and die | Pea sprouts are damaged in hot weather at the beginning of growth or before fruit emergence | Remember that peas are best grown in cool weather. Mulch the roots and use protective netting in hot regions. |
| A large number of leaves but few flowers | Overabundance of nitrogen in the soil | Do not plant peas in soil with fresh fertilizer or mixed with well-fertilized manure. Control the use of nitrogen-containing fertilizers. |
| Abundant flowering, but no pods | High humidity, little sun, dense planting | Thin out the planting. Peas are self-pollinating crops, so you can try shaking the stalks to help the pollen get to the pistil stigmas. |
| Stems are wrinkled with discolored leaves | Fungal or bacterial disease | Remove infected plants. Plant peas in a well-ventilated area. Spray the plants with copper fungicide. |
| Leaves are covered with white powdery spots | Powdery mildew | Be sure to remove weeds and keep the soil moist. Remove damaged plants. Spray the plants with copper. |
Final Thoughts
At first, even a simple crop like peas can feel a little complicated. There’s soil to prep, supports to build, timing to figure out. But once the plants start climbing and those sweet pods appear, it all becomes worth it.
Peas are one of the most beginner-friendly crops. Even more than that, they’re rewarding. You get a crisp, homegrown harvest with very little input, and your soil comes out better too. Since peas naturally enrich the soil with nitrogen, you can follow them with leafy greens, root vegetables, or herbs that love a nutrient boost.
Growing peas is a great way to start the season, learn the basics, and see quick, tasty results. And that first handful of pods you pick? It’s surprisingly satisfying.

